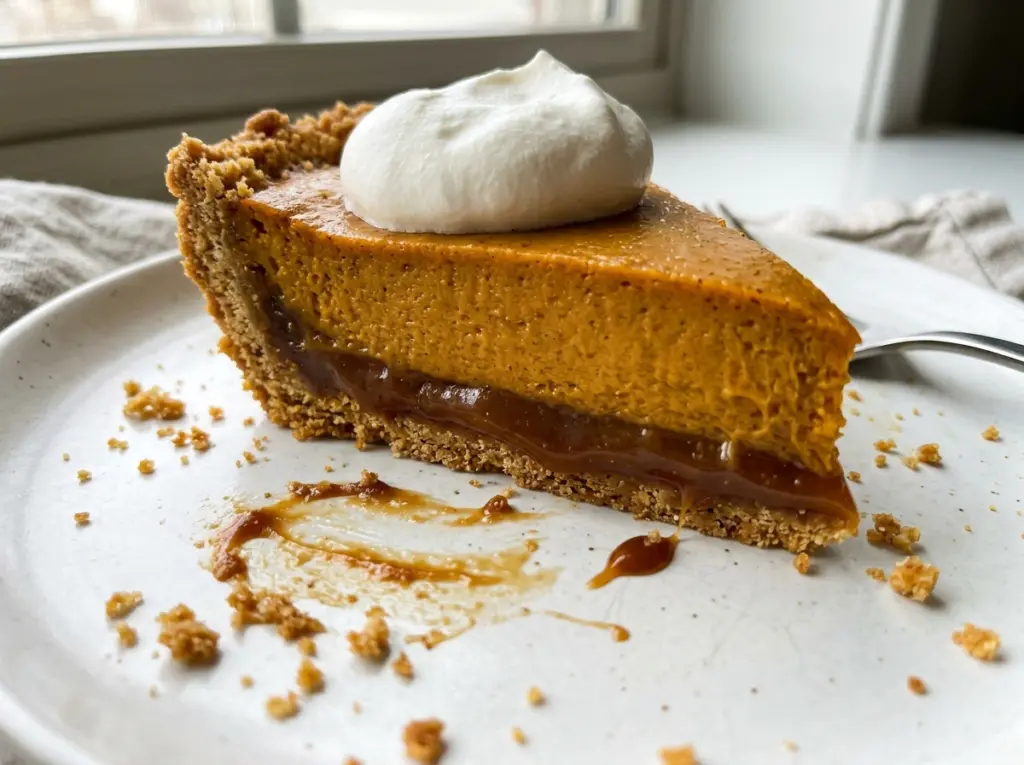
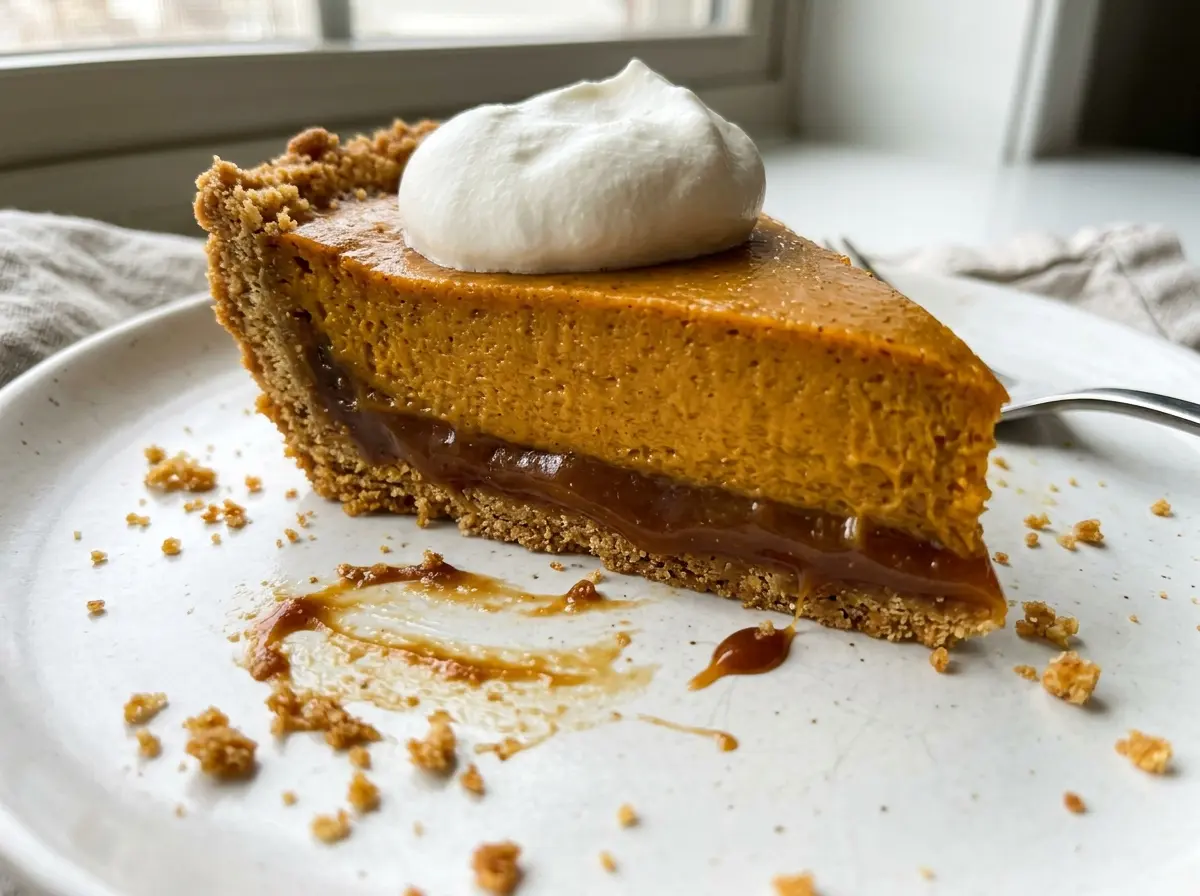
The caramel should spread in a thick, even layer, not run straight into the graham crust. That’s why I reach for a spoonable jarred sauce rather than a thin caramel topping for this Milk Bar Pumpkin Caramel Pie. The pumpkin custard bakes over it, giving each slice a soft, spiced center with a sweet layer tucked underneath.
The two-temperature bake helps the filling set without drying out the edges. It starts in a hot oven, then finishes at a lower temperature, so the center has time to cook through while keeping the slight wobble that makes a custard pie tender. Once chilled, the graham crust gives each slice a buttery base, and the caramel brings a little chew beneath the pumpkin.
Kitchen Note
Give the baked crust the full 15 minutes to cool before you spread on the caramel. The base should feel set, not hot; adding caramel too soon can make it slide around instead of staying in an even layer.
Save Milk Bar Pumpkin Caramel Pie for a bake when you want spiced pumpkin custard with a buttery graham crust and a layer of caramel underneath.
What the Two-Temperature Bake Does for Pumpkin Custard
Pumpkin pie filling is a custard, so it needs enough heat to set the eggs, but a fierce oven for the entire bake can leave the edges overcooked before the middle is ready. Starting at 425°F gives the filling an initial burst of heat. Lowering the oven to 350°F for the longer finish lets the center cook more gently.
Don’t wait for the middle to look completely firm in the oven. The edges should be set, while the center still has a slight jiggle; it continues to settle as the pie cools and chills. The instant-read thermometer gives you a second check, which is helpful because ovens and pie plates don’t all behave exactly alike. Together, the texture cue and temperature help you avoid both a loose center and a dry, firm custard.
The caramel layer makes that gentle finish especially useful. The filling needs to bake through without the crust edges or custard becoming tough while you wait for the middle to catch up. Keep the high-then-low temperature change, and judge the pie by the center rather than by a perfectly still surface.
Why Thick Caramel and Canned Pumpkin Matter in This Pie

- Graham cracker crumbs — Fine, evenly sized crumbs press into a compact crust that holds together when sliced. A store-brand crumb is fine; if you’re crushing crackers yourself, aim for a sand-like texture so there aren’t loose chunks that break away.
- Unsalted butter — Melted butter binds the crumbs and helps them set during the short prebake. Unsalted butter keeps the crust’s seasoning predictable alongside the kosher salt.
- Thick jarred caramel sauce — The texture matters more than a premium label. A sauce thick enough to spread with a spoon stays in a distinct layer; thin squeeze-bottle caramel is more likely to run into the crust or blend into the filling.
- Canned pumpkin puree — Plain puree gives you a consistent, thick base and lets you control the sugar and spices. Don’t use pumpkin pie filling, which is already sweetened and seasoned; the custard balance would change.
- Evaporated milk and eggs — Evaporated milk supplies concentrated dairy without the extra water of regular milk, while the eggs give the filling its custard structure. Sweetened condensed milk isn’t a direct stand-in because it adds a great deal of sugar.
- Brown sugar and warm spices — Packed light brown sugar brings sweetness and a hint of molasses that suits the pumpkin. Fresh, fragrant spices make a noticeable difference; older spices still work, but their aroma will be quieter.
How to Keep the Graham Crust, Caramel, and Custard in Separate Layers
Press and prebake the crust
Heat the oven to 350°F, then stir the graham cracker crumbs with the melted butter, granulated sugar, and salt until the crumbs are evenly moistened. Press the mixture firmly over the bottom and up the sides of a 9-inch deep-dish pie plate. Bake for 8 to 10 minutes, until fragrant and set; a loose, pale crust is more likely to crumble when you serve it.
Cool the crust for 15 minutes, then raise the oven temperature to 425°F. It should be set enough to hold the next layer rather than feeling hot and greasy.
Spread the caramel in an even layer
Spoon the thick caramel over the cooled crust and spread it evenly across the bottom. Keep the layer level so each slice gets some caramel instead of a thick pool in the center. If the sauce is so thin that it runs as soon as you tilt the plate, it’s not the right texture for this layer.
Whisk a smooth pumpkin custard
In a large bowl, whisk together the pumpkin puree, brown sugar, eggs, evaporated milk, cinnamon, ginger, nutmeg, salt, and vanilla until smooth. Scrape the bottom and sides as you whisk so no streaks of pumpkin or brown sugar remain. Stop once the mixture is uniform; then pour it gently over the caramel so the layer underneath stays as even as possible.
Start hot, then finish at a lower temperature
Bake at 425°F for 15 minutes, then reduce the oven to 350°F and bake for 40 to 50 minutes more. The edges should look set while the center still jiggles slightly when the plate is nudged. Check the center with an instant-read thermometer; it should read 175°F. If the middle is still loose before the end of the baking range, give it more time and use both cues rather than relying on the clock alone.
Cool fully before slicing
Set the pie on a rack to cool for 2 hours, then refrigerate it for at least 3 hours before slicing. That rest gives the custard time to firm up, so the filling is less likely to slump when cut. Slicing before the chill is complete leaves the warm custard soft and the caramel layer harder to see.
Three Small Changes That Shift This Pie’s Sweetness or Spice
Use a gluten-free graham crust
Replace the graham cracker crumbs with the same amount of gluten-free graham cracker crumbs, then keep the butter, sugar, salt, and pressing method the same. The crust’s flavor and texture will depend on the crumbs you choose, but it keeps the pie’s familiar buttery base.
Lean into the caramel
Swap the thick caramel sauce for thick salted caramel sauce in the same amount. It gives the layer a sharper sweet-salty note, so choose a sauce you like straight from the jar; a thin topping won’t sit as neatly under the custard.
Make it a less-sweet pumpkin pie
Leave out the caramel layer and pour the pumpkin filling straight into the prebaked crust. The pie will have a more direct pumpkin-and-spice flavor and lose the soft, chewy contrast beneath the custard.
Storage and Reheating
- Refrigerator: Keep the covered pie refrigerated for 3 to 4 days. The crust softens a little as it sits, while the chilled custard stays sliceable.
- Freezer: The pie can be frozen, though the custard may soften or release a little moisture after thawing. Wrap the fully chilled pie tightly and thaw it in the refrigerator before serving.
- Reheating: Serve it chilled; reheating isn’t needed. Warming can loosen the custard and caramel, making the slices harder to hold.
Questions That Come Up Before Slicing Pumpkin Caramel Pie
Milk Bar Pumpkin Caramel Pie
Ingredients
Equipment
Method
- Heat the oven to 350°F.
- Stir the graham cracker crumbs, melted butter, granulated sugar, and salt until evenly moistened.
- Press the crumb mixture firmly over the bottom and up the sides of a 9-inch deep-dish pie plate.
- Bake for 8 to 10 minutes, until fragrant and set.
- Cool for 15 minutes.
- Raise the oven temperature to 425°F.
- Spread the caramel sauce in an even layer over the cooled crust.
- Whisk the pumpkin puree, brown sugar, eggs, evaporated milk, cinnamon, ginger, nutmeg, salt, and vanilla in a large bowl until smooth.
- Pour the filling over the caramel.
- Bake at 425°F for 15 minutes.
- Reduce the oven to 350°F and bake for 40 to 50 minutes more, until the edges are set, the center jiggles slightly, and an instant-read thermometer inserted in the center reads 175°F.
- Cool on a rack for 2 hours.
- Refrigerate for at least 3 hours before slicing.


