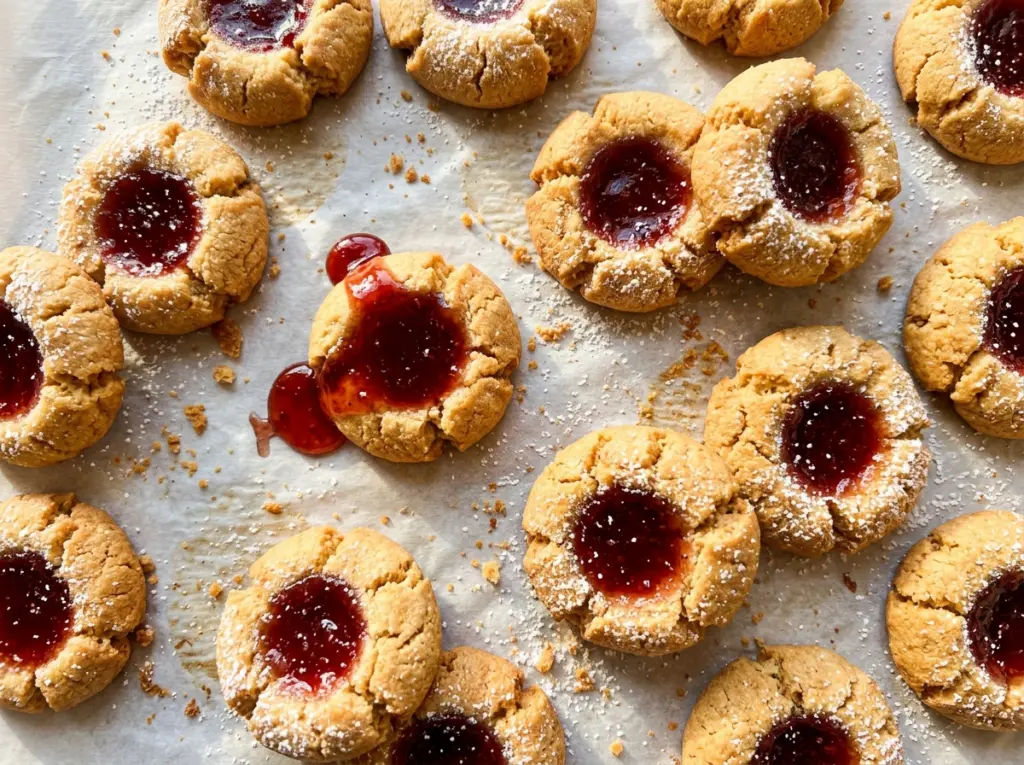
The first thing you notice is how the thumb-sized wells hold their shape while the cookie edges turn lightly golden. I used to press the centers too shallowly, and the jam had nowhere to sit once the dough puffed in the oven. A deeper indentation gives each cookie a soft, buttery rim and a neat pool of fruit in the middle. These jam thumbprint cookies use raspberry or strawberry jam, so you can make a whole batch one way or divide it between both.
The dough is rich and tender, and a short chill makes it much easier to roll into even balls and shape without a sticky mess. I mix it only until a soft dough forms, then cover and chill it for 30 minutes before shaping. That little pause makes the dough easier to handle and keeps the cookies looking like thumbprints instead of spreading into flat rounds. Once they’ve cooled, the edges have a delicate bite and the centers stay pleasantly jammy.
Kitchen Note
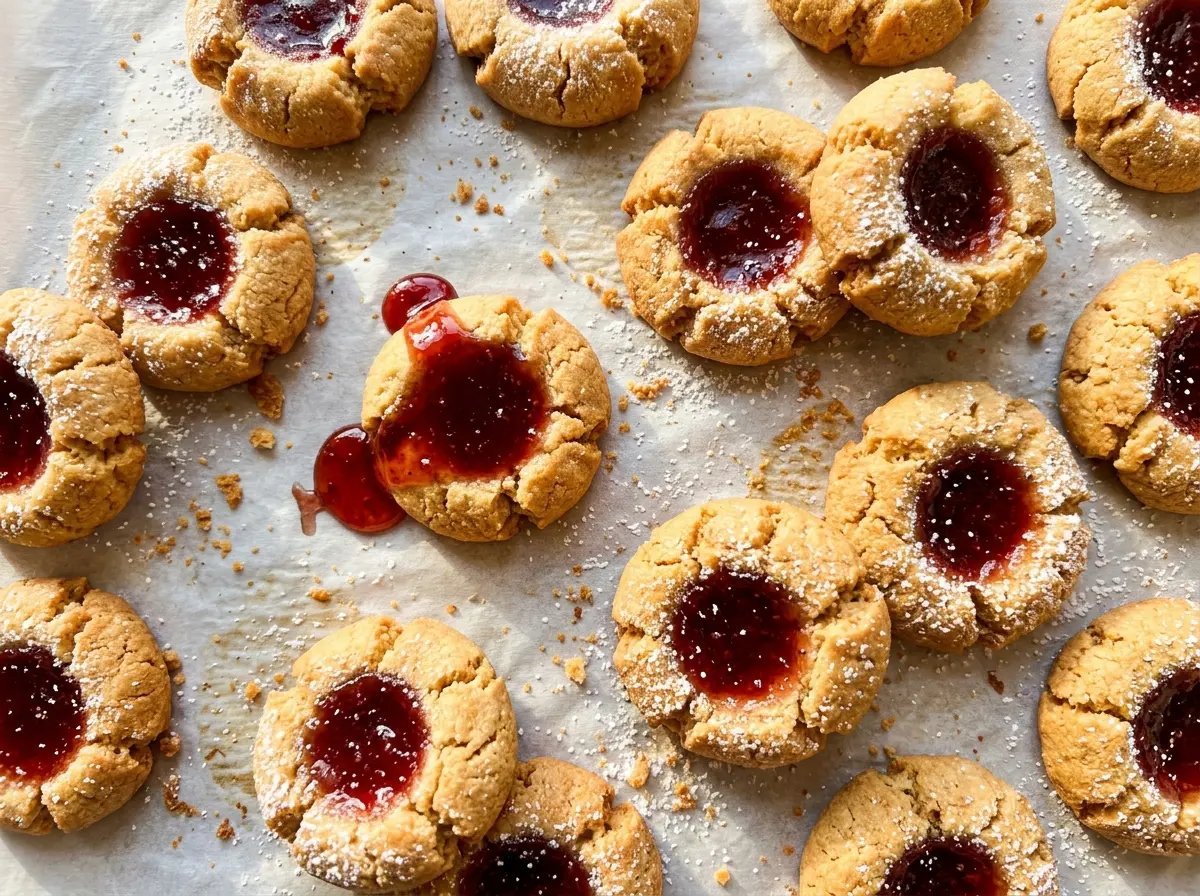
I swap the baking sheets’ oven positions halfway through, rather than waiting until the cookies look done. That gives both pans a chance to bake evenly, even if your oven has a warmer spot.
Save these jam thumbprint cookies for a buttery, tender cookie with a raspberry or strawberry center.
Why a Short Chill Makes These Thumbprints Easier to Shape
Butter cookie dough can be soft right after mixing, especially once the butter and sugar have been beaten until light and fluffy. If you start rolling at that point, the dough may cling to your hands and the balls can end up uneven. Uneven balls bake at different rates, which means a few cookies may be ready while others still need time. Covering the dough and chilling it for 30 minutes gives it a firmer, more cooperative feel.
That rest also makes the shaping more predictable. You can roll tablespoon-size portions into smooth balls, space them evenly, and press a clean indentation into each one without the dough feeling greasy. The goal isn’t a hard dough; it should still yield under your thumb. If it’s sticky or slumping as you work, it needs more time to chill before you continue. With the dough cool and the wells deep, the jam stays centered and the cookies keep their rounded shape.
What the Butter, Egg Yolk, and Jam Each Bring

- Unsalted butter — Softened butter creams smoothly with the sugar and gives the cookies their tender, rich crumb. Let it soften until it yields when pressed but isn’t melted or shiny; melted butter won’t cream the same way. Unsalted butter also lets the measured salt stay in control, so I wouldn’t swap in salted butter without changing the seasoning.
- Granulated sugar — Sugar helps the butter mixture turn light and fluffy and gives the finished edges a delicate crispness. Regular granulated sugar is the right choice here; a coarse or powdered sugar changes how the dough creams and bakes.
- Egg yolk — The yolk binds the dough while keeping it rich and tender. Using a whole egg adds extra white and moisture, so it isn’t a one-for-one replacement in this small-batch dough.
- Vanilla extract — Vanilla rounds out the buttery dough without competing with the fruit. A standard bottle works well; there’s no need to seek out a specialty extract for this cookie.
- All-purpose flour and salt — All-purpose flour gives the dough enough structure to hold the thumbprint, while salt keeps the buttery sweetness from tasting flat. Spoon flour into the measuring cup and level it rather than packing it down; too much flour can make the dough dry and crumbly.
- Raspberry or strawberry jam — Either gives you a bright fruit center that contrasts with the plain, buttery cookie. Choose a jam you like the taste of on its own, since the fruit stays clearly noticeable. The recipe works with either option; use one throughout or divide the batch between them.
From Soft Dough to Neat Jam Centers
Cream the Butter and Sugar Until Light
Beat the softened butter and granulated sugar in a large bowl for about 2 minutes, until the mixture looks lighter and fluffy. Add the egg yolk and vanilla, then beat until they’re combined. If the butter is too cold, it won’t blend smoothly; if it’s melted, the mixture won’t become properly fluffy. Scrape the bowl as needed so the yolk and vanilla are mixed through instead of sitting at the bottom.
Stop Mixing When the Dough Comes Together
Add the flour and salt and mix just until a soft dough forms. The dough should hold together when pressed, but it doesn’t need extra mixing once the flour disappears. Overworking it can make the cookies tougher rather than tender. Cover the bowl and chill the dough for 30 minutes before shaping.
Shape Even Balls and Press Deep Wells
Heat the oven to 350°F and line two baking sheets with parchment paper. Roll the chilled dough into 24 tablespoon-size balls and arrange them about 2 inches apart on the sheets. Press a deep indentation into the center of each ball with your thumb, then spoon about 1/2 teaspoon of raspberry or strawberry jam into each well. Keep the jam inside the indentation so it has room to sit in the center as the cookie bakes.
Bake Until the Edges Turn Lightly Golden
Bake both sheets for 12 to 15 minutes, swapping their oven positions halfway through. Watch the cookie edges for a light golden color; the centers will look softer than the edges, and that’s expected. Let the cookies cool on the baking sheets for 5 minutes before transferring them to a wire rack. They’re delicate while hot, so moving them too early can break the tender edges.
Two Jams, Three Ways to Make the Batch Your Own
Keep the Batch Raspberry-Forward
Use raspberry jam in every cookie for a tangier fruit center against the sweet, buttery dough. The method and texture stay the same, while the flavor leans bright and tart.
Make a Strawberry Batch
Choose strawberry jam for a softer, sweeter fruit note. It’s an easy way to give the same tender cookie a gentler center without changing the dough or bake.
Split the Cookies Between Both Jams
Divide the cookies between raspberry and strawberry so you get two fruit flavors in one batch. Keep track of which jam is on which sheet if you want the finished cookies sorted by flavor.
Storage and Reheating
- Refrigerator: Refrigeration isn’t needed for these cookies. Keep them in an airtight container at room temperature for up to 5 days; the centers stay soft and the edges gradually lose a little crispness.
- Freezer: Freeze fully cooled cookies in an airtight container for up to 2 months, separating layers so the jam doesn’t stick to the cookies above. Thaw them at room temperature before serving.
- Reheating: They’re best at room temperature and don’t need reheating. Avoid microwaving, which can make the jam excessively hot before the cookie warms evenly.
Questions That Come Up While Making Thumbprint Cookies
Jam Thumbprint Cookies
Ingredients
Equipment
Method
- Heat the oven to 350°F.
- Line two baking sheets with parchment paper.
- In a large bowl, beat the butter and sugar until light and fluffy, about 2 minutes.
- Beat in the egg yolk and vanilla until combined.
- Add the flour and salt and mix just until a soft dough forms.
- Cover the dough and chill for 30 minutes.
- Roll the dough into 24 tablespoon-size balls.
- Arrange the balls about 2 inches apart on the prepared baking sheets.
- Press a deep indentation into the center of each ball with your thumb.
- Spoon about 1/2 teaspoon jam into each indentation.
- Bake both sheets for 12 to 15 minutes, swapping their oven positions halfway through, until the cookie edges are lightly golden.
- Cool the cookies on the baking sheets for 5 minutes.
- Transfer the cookies to a wire rack to cool completely.


