
The cream should be steaming when it hits the chocolate, not bubbling away on the stove. The first time I made these, I let the cream get too hot and had to wait longer for the ganache to turn smooth. Now I watch for steam, pour it over finely chopped chocolate, and give it five quiet minutes before stirring. That simple pause is what makes these chocolate candy cane truffles creamy in the middle instead of grainy.
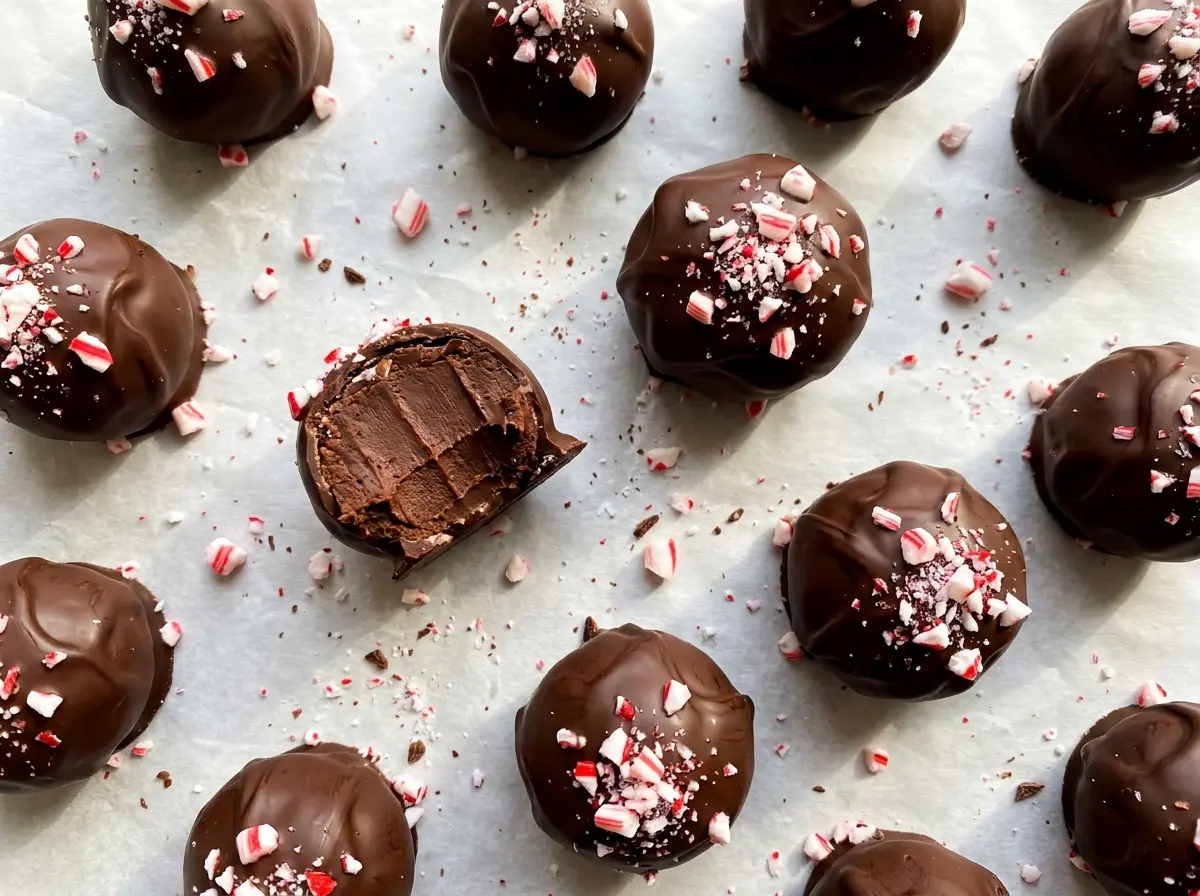
The centers need a good chill before they’re ready to roll, and another short one before dipping. That gives the ganache time to firm up and keeps the truffles easier to handle in the warm coating. I also crush the candy canes finely so they cling to the chocolate shell instead of tumbling off. Each bite has a soft peppermint center, a thin chocolate coating, and a crisp candy cane finish.
Kitchen Note
Crush the candy canes finely, but don’t turn them to dust. Tiny crisp pieces stick to the coating, while larger shards are more likely to fall off when you pick up a truffle.
Save these chocolate candy cane truffles for a batch of soft peppermint centers, a smooth chocolate shell, and a crisp candy cane finish.
Why These Truffles Have a Soft Center and a Separate Chocolate Shell
There are two different chocolate textures here, and each comes from a different job. The center starts as ganache: semisweet chocolate softened with hot cream and butter. Once chilled, it becomes firm enough to scoop but stays tender when you bite through it. Peppermint extract goes into that mixture after it’s smooth, so the mint is carried through the center rather than left just on the outside.
The coating is a second layer of semisweet chocolate, melted with a little vegetable oil. It’s not the same mixture as the ganache; it sets around the cold centers and gives each truffle a thin shell. That contrast is what keeps these from eating like a solid ball of chocolate. The candy cane pieces add crunch and a sharper peppermint note right at the surface, so you get the soft middle, the coating, and the crisp topping in distinct bites.
Keeping the center and coating separate also makes the finish easier to manage. The ganache can chill until scoopable while the coating waits until the centers are shaped and cold. There’s no need to temper chocolate for this method, though the coating won’t have the precise shine and snap of tempered chocolate.
What Each Chocolate and Peppermint Ingredient Does

- Semisweet chocolate — Use good-quality bars or baking chocolate and chop it finely; smaller pieces melt more evenly under the hot cream. The same semisweet style works for the coating, keeping the shell balanced with the sweet candy canes. Chocolate chips are convenient, but their added stabilizers can make them melt less smoothly.
- Heavy cream — Its fat gives the center a creamy, truffle-like texture. Milk doesn’t provide the same richness or set, so it isn’t a direct swap here.
- Unsalted butter — Butter rounds out the ganache and adds richness. Unsalted butter keeps the flavor controlled; salted butter can work, though the finished center may taste a little saltier.
- Peppermint extract — It gives the center its mint flavor without adding liquid in a large amount. Peppermint extract is potent, so measure it carefully rather than pouring by eye.
- Vegetable oil — A small amount loosens the coating chocolate so it’s easier to dip the chilled centers. It’s a neutral choice; strongly flavored oils would be noticeable.
- Candy canes — Finely crushed pieces add both mint and crunch. They’re the finishing touch, so use fresh candy canes that still break cleanly rather than pieces that have gone sticky.
Building the Ganache, Shaping the Centers, and Dipping
Let the Hot Cream Do the Melting
Line an 18×13-inch rimmed baking sheet with parchment, then put the finely chopped chocolate in a heatproof bowl. Warm the cream and butter in a small saucepan over medium-low heat until steaming, about 2 to 3 minutes; don’t let it boil. Pour the hot cream mixture over the chocolate and leave it undisturbed for 5 minutes before stirring. Stir until the ganache is smooth, then stir in the peppermint extract; if you start stirring too soon, some chocolate may still be unmelted.
Chill Until the Ganache Can Hold Its Shape
Cover the bowl and refrigerate the ganache until firm enough to scoop, about 2 hours. It should be set rather than runny, but still soft enough for a scoop to portion it. Scoop 24 portions, about 1 tablespoon each, and roll them into balls. If the mixture feels too soft to roll neatly, give it more time in the refrigerator instead of trying to shape warm ganache.
Cool the Centers Before Coating
Arrange the rolled centers on the parchment-lined baking sheet and refrigerate for 20 to 30 minutes. While they chill, melt the chopped coating chocolate and vegetable oil in a heatproof bowl in the microwave at 50% power, stirring every 30 seconds, until smooth, about 1 to 2 minutes. Lower power and frequent stirring help keep the chocolate from scorching around the edges. Dip each chilled truffle in the melted chocolate and return it to the baking sheet.
Finish Before the Shell Sets
Sprinkle each truffle with crushed candy canes immediately after dipping, while the chocolate coating is still wet. If you wait until the shell has set, the topping won’t cling as well. Refrigerate the finished truffles until the coating is set, about 15 to 20 minutes. Let them stand at room temperature for 10 minutes before serving so the centers aren’t too firm.
Simple Ways to Change the Mint and Chocolate Balance
A Gentler Mint Center
Leave the peppermint extract out of the ganache but keep the crushed candy canes on top. The chocolate center will taste less minty, while the topping still gives each truffle a peppermint crunch.
A More Intense Chocolate Bite
Replace the semisweet chocolate with bittersweet chocolate by weight in both the centers and coating. The truffles will taste less sweet and more cocoa-forward, while the candy cane topping keeps the peppermint finish.
A Dairy-Free Batch
Use dairy-free semisweet chocolate for both layers, full-fat coconut cream in place of the heavy cream, and dairy-free butter in place of the unsalted butter. Choose candy canes made without dairy, too. The coconut cream may add a faint coconut note, and the ganache may need extra chilling time to become firm enough to scoop.
Storage and Serving
- Refrigerator: Keep the truffles in an airtight container for up to 1 week. The centers will be firm straight from the fridge.
- Freezer: Freeze the uncoated centers in a single layer until solid, then transfer them to an airtight container for up to 2 months. Thaw them overnight in the refrigerator before dipping.
- Serving: Let refrigerated truffles stand at room temperature for 10 minutes before serving. Don’t leave them sitting out for an extended stretch, since the cream-based centers are best kept chilled.
Questions That Come Up While Making These Truffles
Chocolate Candy Cane Truffles
Ingredients
Equipment
Method
- Line an 18x13-inch rimmed baking sheet with parchment paper.
- Place the finely chopped chocolate in a heatproof bowl.
- Heat the heavy cream and butter in a small saucepan over medium-low heat until steaming, about 2 to 3 minutes; do not let it boil.
- Pour the hot cream mixture over the chocolate and let stand for 5 minutes.
- Stir the chocolate mixture until smooth, then stir in the peppermint extract.
- Cover the ganache and refrigerate until firm enough to scoop, about 2 hours.
- Scoop the ganache into 24 portions, about 1 tablespoon each, and roll into balls.
- Arrange the truffle balls on the prepared baking sheet and refrigerate for 20 to 30 minutes.
- Melt the chopped chocolate and vegetable oil in a heatproof bowl in the microwave at 50% power, stirring every 30 seconds, until smooth, about 1 to 2 minutes.
- Dip each chilled truffle in the melted chocolate and return it to the baking sheet.
- Immediately sprinkle the truffles with crushed candy canes.
- Refrigerate the truffles until the coating is set, about 15 to 20 minutes.
- Let the truffles stand at room temperature for 10 minutes before serving.


